Blog
Posts 1–5 of 47
Page 1 of 10
PCB Heater Design tool
27 July 2026 · Open this post on its own

I needed to create a PCB design tool that would work out the trace width and length to heat at an approximate power at a defined voltage. Also whilst I was at it I added features that made nicer infill patterns using well known space filling algorithms. It can then export that design as an inverted image for DIY PCB etching or KiCAD so it can be fabricated.

Here is what I created, it works fairly close to the intended power a heats up nicely, I also think the Moore (Hilbert) curve looks nice with round corners!
New EuroClack Kits
27 June 2024 · Open this post on its own
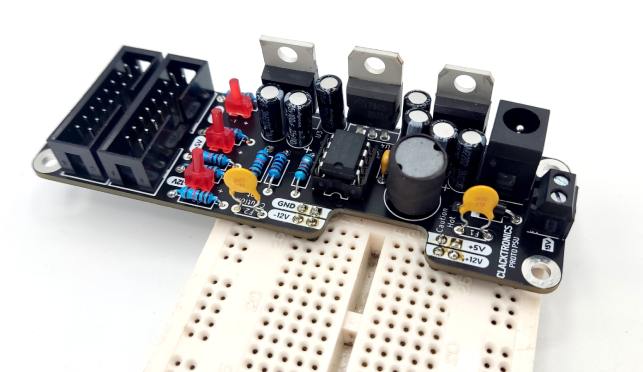
There are two new Eurorack kits, one is called ProtoPSU which is a breadboardable power supply to create +-12V and 5V from a 15V supply. The other is Analogue Meter which is a physical meter for Eurorack to observe DC and slow moving voltages.
Build Your Own Modular
27 June 2024 · Open this post on its own
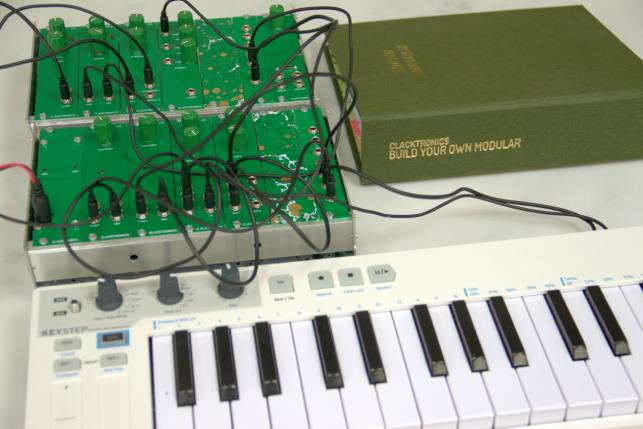
I have just released a new projects called BUILD YOUR OWN MODULAR, it is a ring binder book that contains all the PCBs and the documentation to build your own complete Eurorack modular. See the complete project page and where to buy here! BUILD YOUR OWN MODULAR - Project page
EuroClack - Mini Speaker
09 August 2019 · Open this post on its own
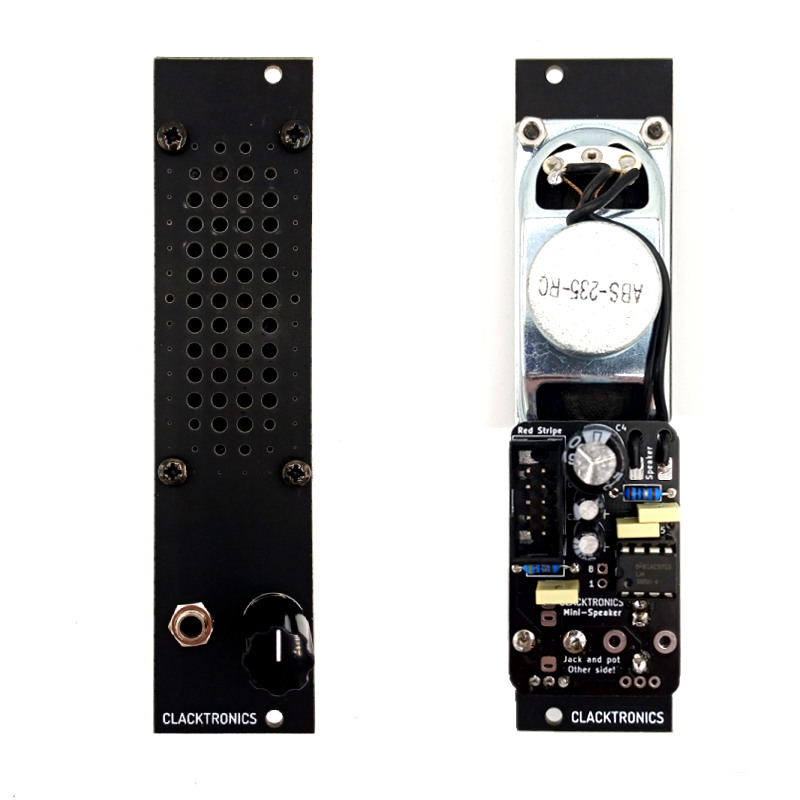
I am back to producing audio equipment! There is a new section under "Reasearch" called EuroClack, it is for synth DIY and I am producing and selling full kits / designing open source modules. The first full kit is a mini-speaker that fits into 6HP, see more inforation on the page.
Flip dots with Python
03 January 2019 · Open this post on its own
I have been working on a project for an artist that uses flip dot display panels. Flip dot/disc displays are a bygone technology that were typically used in places such as airports and stock exchanges, anywhere there was a need for dynamically displayed information. They were great for power efficiency as they retain their image with the power removed, therefore would have been much less power hungry than the light based displays of the time. Now superseded by LED displays that are just as efficient, but need less maintenance, they are still manufactured by Alfa-Zeta and used for more creative / nostalgic purposes. For this work I needed to create a program to show images on the panels, initially I was unsure of the source of the images, could it be a video? or programatically generated? So I decided to go as high level as possible and use Python on a Raspberry Pi. That way I would not have to re-write the program every time the ideas or the dimensions changed. I thought it would be great to be able to use Python Imaging Library pillow fork to manipulate the dots, that way I could draw shapes and text trivially, plus if any changes were needed I could write them quickly on the fly. I came up with FliPIL a sort of wrapper between PIL and the flip dot's protocol.
Alfa-Zeta sell the flip dots in controllable panel modules, the larger one is made up of of two 7x28 sections which is the type I used. Each 7x28 section has an ATMEGA micro-controller that receives messages over RS485 interface. The way you address each panel is by setting it in binary on a DIP switch connected to its microcontroller. The protocol to then control the panel is quite simple, you send a series of bytes, the first few bytes being meta information like address of the panel then there is a series of 28 bytes each representing a column (or row depending on your perspective) of 7 dots. So for example if I wanted the second row to be 0010011 I would send a byte for the first column then another with the value 19 (the last bit being ignored).
To make a display you have to tile the flip dot panels and set the addresses. I designed the wrapper class to make a PIL Image object that is the same width and height as the desired display then translate that image into the command for the flip dot display. To tell my program what the panel is like you have to define the layout using a two-dimensional array ('list' in python), this has to be done otherwise there is no-knowing the physical location of all the flip dot modules.
panel1 = flipil("alfa_zeta", [28, 7], [[1,2],[3,4],[5,6]])
The wrapper is all set up as a class, you have to initiate the panel as an object with the above line. The first two arguments are so I could possibly add different types of flip dot modules in the future. The third is the one that defines the layouts, each list within the list represents a row and each entry in each inner list represents a column, the numbers are the panel module addresses. So the above would be interpreted as the following.
1 2
3 4
5 6
There are two other optional arguments, initial colour=[0 or 1], black or white obviously! And reverse_panel=[bool]a way to reflect the image, this is in case the panel has been put in the wrong way around. The panel object creates an image internally using PIL, in the case above a 56px width (2x28) by 21px high (3x7) image is created. Using the __getattr__() method, any PIL object applied to the fliPIL based object unknown will be applied to the internal image object, that way PIL objects like ImageDraw can be applied to it. Below I initiate ImageDraw() then I draw an ellipse.
draw = ImageDraw.Draw(panel1)
draw.ellipse((0,0,10,10), outline=1, fill=0)
The image data bears no resemblance to the Alfa-Zeta protocol so this needs to be translated using the rows and columns layout into a command. Then there is a method to send the command over the serial connection. You can see I intended _translate() to be a private method that would run every time I made a change to the image display but then I realised it would be more efficient to run it only when needed. I need to remove the underscore but I am committed to it now!
panel1._translate()
panel1.send()
Finally I also added a command to 'clear' the image, this is very useful if you are animating. The 0 is the colour it clears to, so in theory you can make it all white!
panel1.clear(0)
That's it! you can see an example below of a "bouncing ball" animation on a 2x6 panel display. Notice that because it has an image representing the display in the wrapper program, I can get the width and height of the display, so those properties will automatically change if I change the size of the panel, this demonstrates the flexibility of the wrapper.
flipdot_bounce.py
from PIL import ImageDraw
from flipil import flipil

  from time import sleep
  refresh = [0x80,0x82,0x8F]

  panel_adds =[[1,2],[3,4],[5,6],[7,8],[9,10],[11,12]]

  panel1 = flipil("alfa_zeta", [28, 7], panel_adds, init_color = 0, reverse_panel=False)
  panel1.set_port('/dev/ttyAMA0', 57600)

  draw = ImageDraw.Draw(panel1)

  size = 10
  dir_x = 1
  dir_y = 1
  x = 1
  y = 1

  while True:
      sleep(.01)

      if x+size+2 > panel1.width or x < 1:
                dir_x *= -1
      if y+size+2 > panel1.height or y < 1:
                dir_y *= -1

      x += dir_x
      y += dir_y

      panel1.clear(0)
      draw = ImageDraw.Draw(panel1)
      draw.ellipse((x,y,x+size,y+size), outline=1, fill=0)

      panel1._translate()
      panel1.send()
Page 1 of 10